Touchscreen
Everything is reached from the home screen, and every page has a back button to it. There is no menu tree to get lost in.
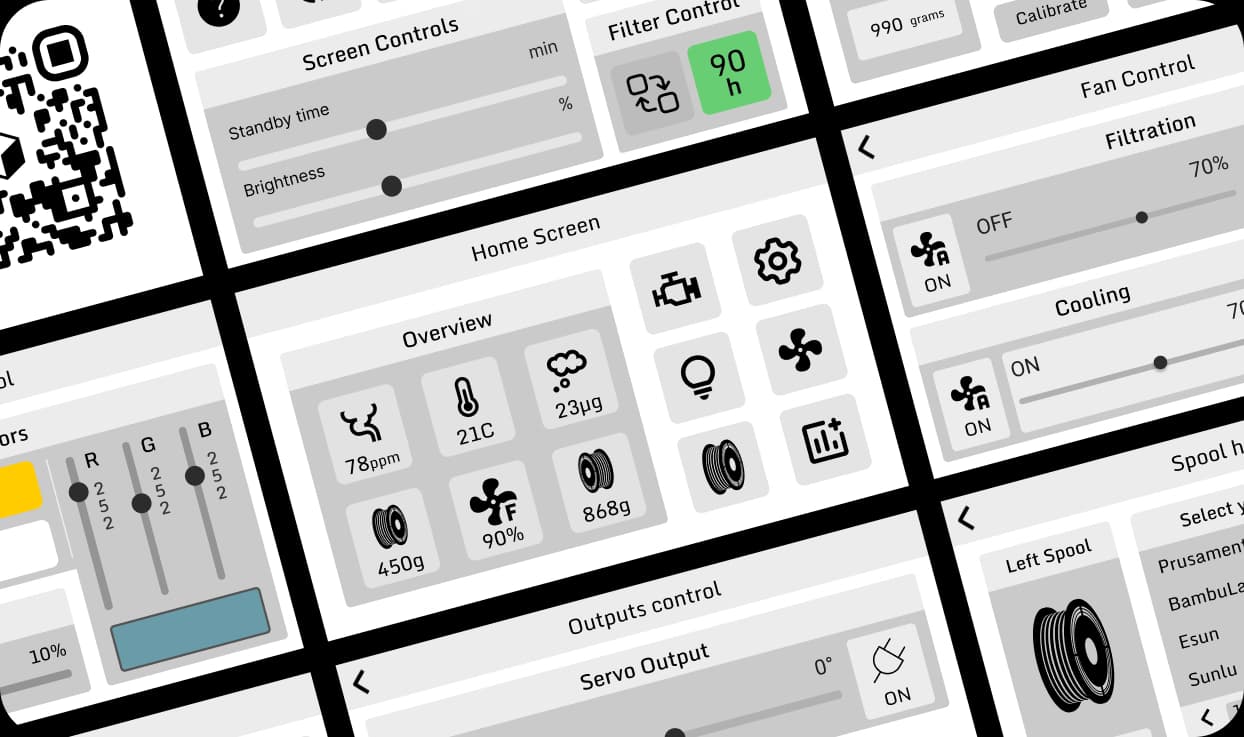
Home
 |- Fan Control      filter fan, cooling fan, extra fan, flap
 |- Spool Holders    pick your spool, calibrate, register a custom spool
 |- Sensors          logging on/off, interval, format the card
 |- Lighting         colour, brightness, presets, LED bar
 |- Output Control   LED bar, relay, auto servo
 |- Settings         brightness, standby, usage counter, mute, reset
     |- Support
     |- Configuration > Features > System Check > Calibration
Home
Live readings, and six buttons to the pages above. Temperature, humidity, air quality and filament weight are all here.
Sensor readings keep updating in the background whichever page you are on, so the safety responses and the log do not depend on where you left the screen.
Fan Control
| Control | Does |
|---|---|
| Filter AUTO | Fan follows air quality |
| Filter MANUAL and slider | You set the speed |
| Cooling AUTO | Fan follows temperature |
| Cooling MANUAL and slider | You set the speed |
| Extra fan | On and off. Speed comes from extraFanSpeed |
| OPEN and CLOSE | Moves the duct flap |
Auto and manual are mutually exclusive per fan. Moving a slider switches that fan to manual, and pressing AUTO clears manual. The two fans are independent, so one can be automatic while the other is not.
The OPEN and CLOSE button is the only servo control. There used to be a position slider on
the Output Control page, and it is now dead on purpose. Set the two end positions with
servoOpenAngle and servoCloseAngle in
data.clu instead.
The flap position is remembered across power cycles. Safety overrides can move it, as covered in Safety Systems.
Spool Holders
Four spools per page, with arrows to page through your library. Tick one box on the left column and one on the right, for the two holders.
Two buttons take you out of this page:
- Calibrate, for load cell calibration, the one you do once
- Custom spool, for registering a new brand
The weight shown is net filament weight, meaning the measured weight minus the selected spool’s empty weight. With nothing on the holder it reads as a negative number, specifically the negative of the tare weight. That is correct.
Sensors
Raw sensor readings, plus the logging controls:
- Logging on and off
- Interval, which cycles through 5 min, 10 min and 60 min
- Format, which deletes
log.csvand starts fresh
This page is the right place to watch raw gas and smoke values before changing an alarm threshold.
Lighting
Colour and brightness for the WS2812B strip, seven preset buttons, and the LED bar switch.
Brightness is a multiplier on the colour, so a dim red and a bright red are the same preset at different brightness values.
The strip turns red when the smoke or gas alarm triggers, overriding whatever you have set. It goes back to your colour once the sensors read clear.
Output Control
- LED bar, which is the same switch as on the Lighting page
- Relay, for the solid state relay output
- Auto servo, for automatic flap control
- Servo power, which affects auto mode only
The servo position slider on this page does nothing. See the note under Fan Control.
Settings
| Control | Notes |
|---|---|
| Brightness | Floored at minBrightness, which is 15 by default, so the screen never goes fully dark |
| Standby | Minutes of no touch before the screen switches off |
| Set baseline | Currently has no effect. It stores a temperature and gas reference that nothing reads yet |
| Mute | Silences the buzzer only |
| Alarm LED | Turns off the red alarm lighting only |
| Reset usage counter | Clears the filter runtime counter |
| Restart | Reboots the mainboard |
| Configuration | Runs the first setup again |
| Support | Contact information |
Mute and the alarm LED toggle do not touch the fan cutoff or the flap. Silencing a nuisance alarm can never disable the actual safety response. See Safety.
Standby
After the standby time with no touch, the screen switches off. Your settings are saved to the mainboard’s memory at that moment, which is a useful side effect: letting the screen sleep before you unplug is a good habit.
Touching the screen wakes it.