Learning How to Assemble
If this is your first build, take a moment to understand the manual structure and the components you’ll be using.
Manual Structure & Timing
The manual is divided into logical sections. Here is an approximate time for each:
| Section | Description | Approx. Time |
|---|---|---|
| Frame Assembly | Building the aluminum skeleton | 45-60 mins |
| Panel Installation | Installing acrylic panels | 30-45 mins |
| Electronics | Mounting PSU, wiring, screen | 60-90 mins |
| Final Checks | Calibration and testing | 20 mins |
How the Manual is Structured
The assembly process is divided into logical sections, each following a standard format:
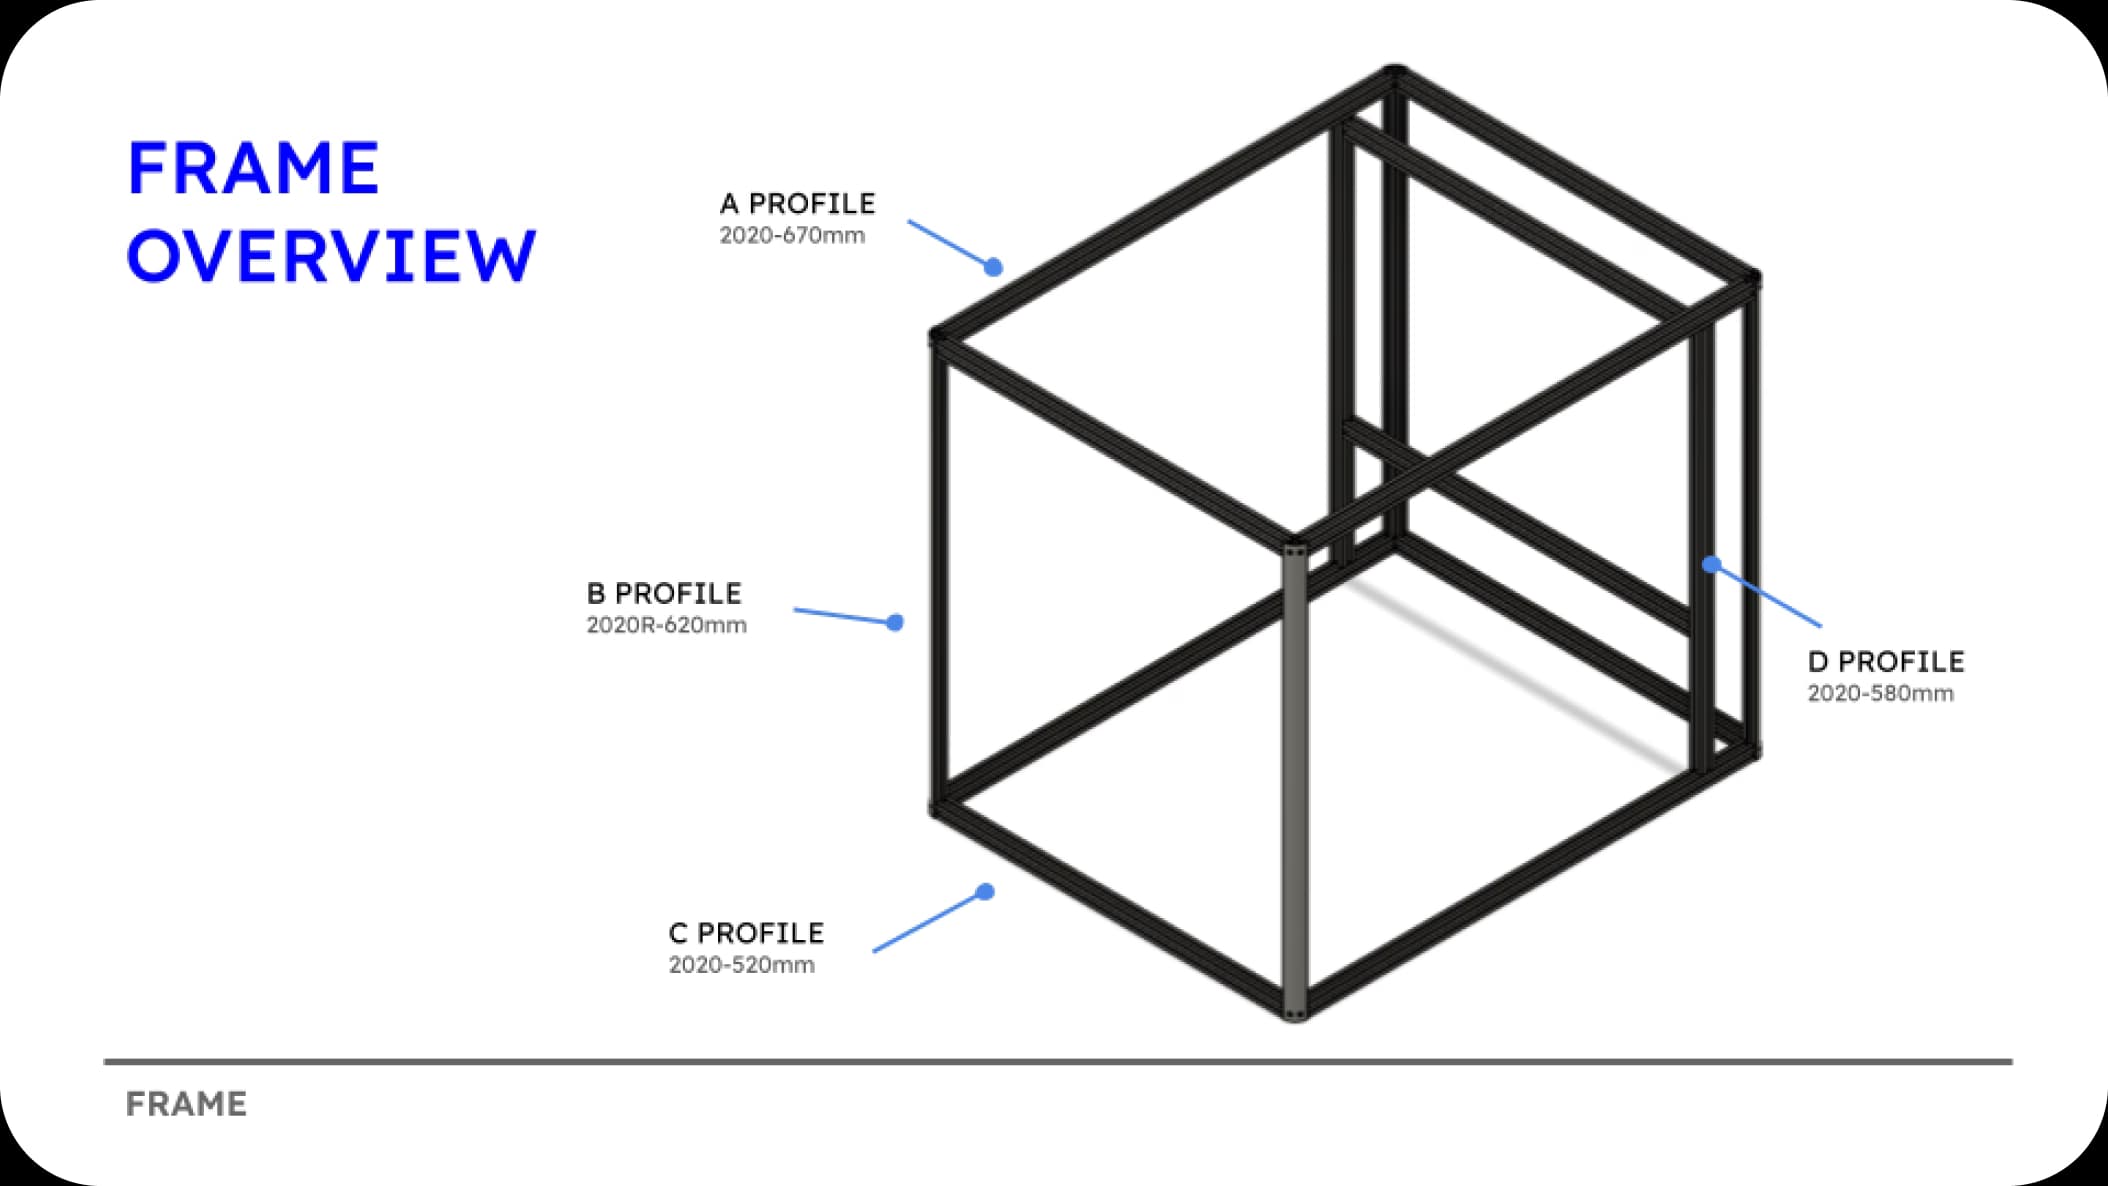
Introduction & Overview
Each section begins with a general introduction followed by an overview of the sub-assembly you will be building.
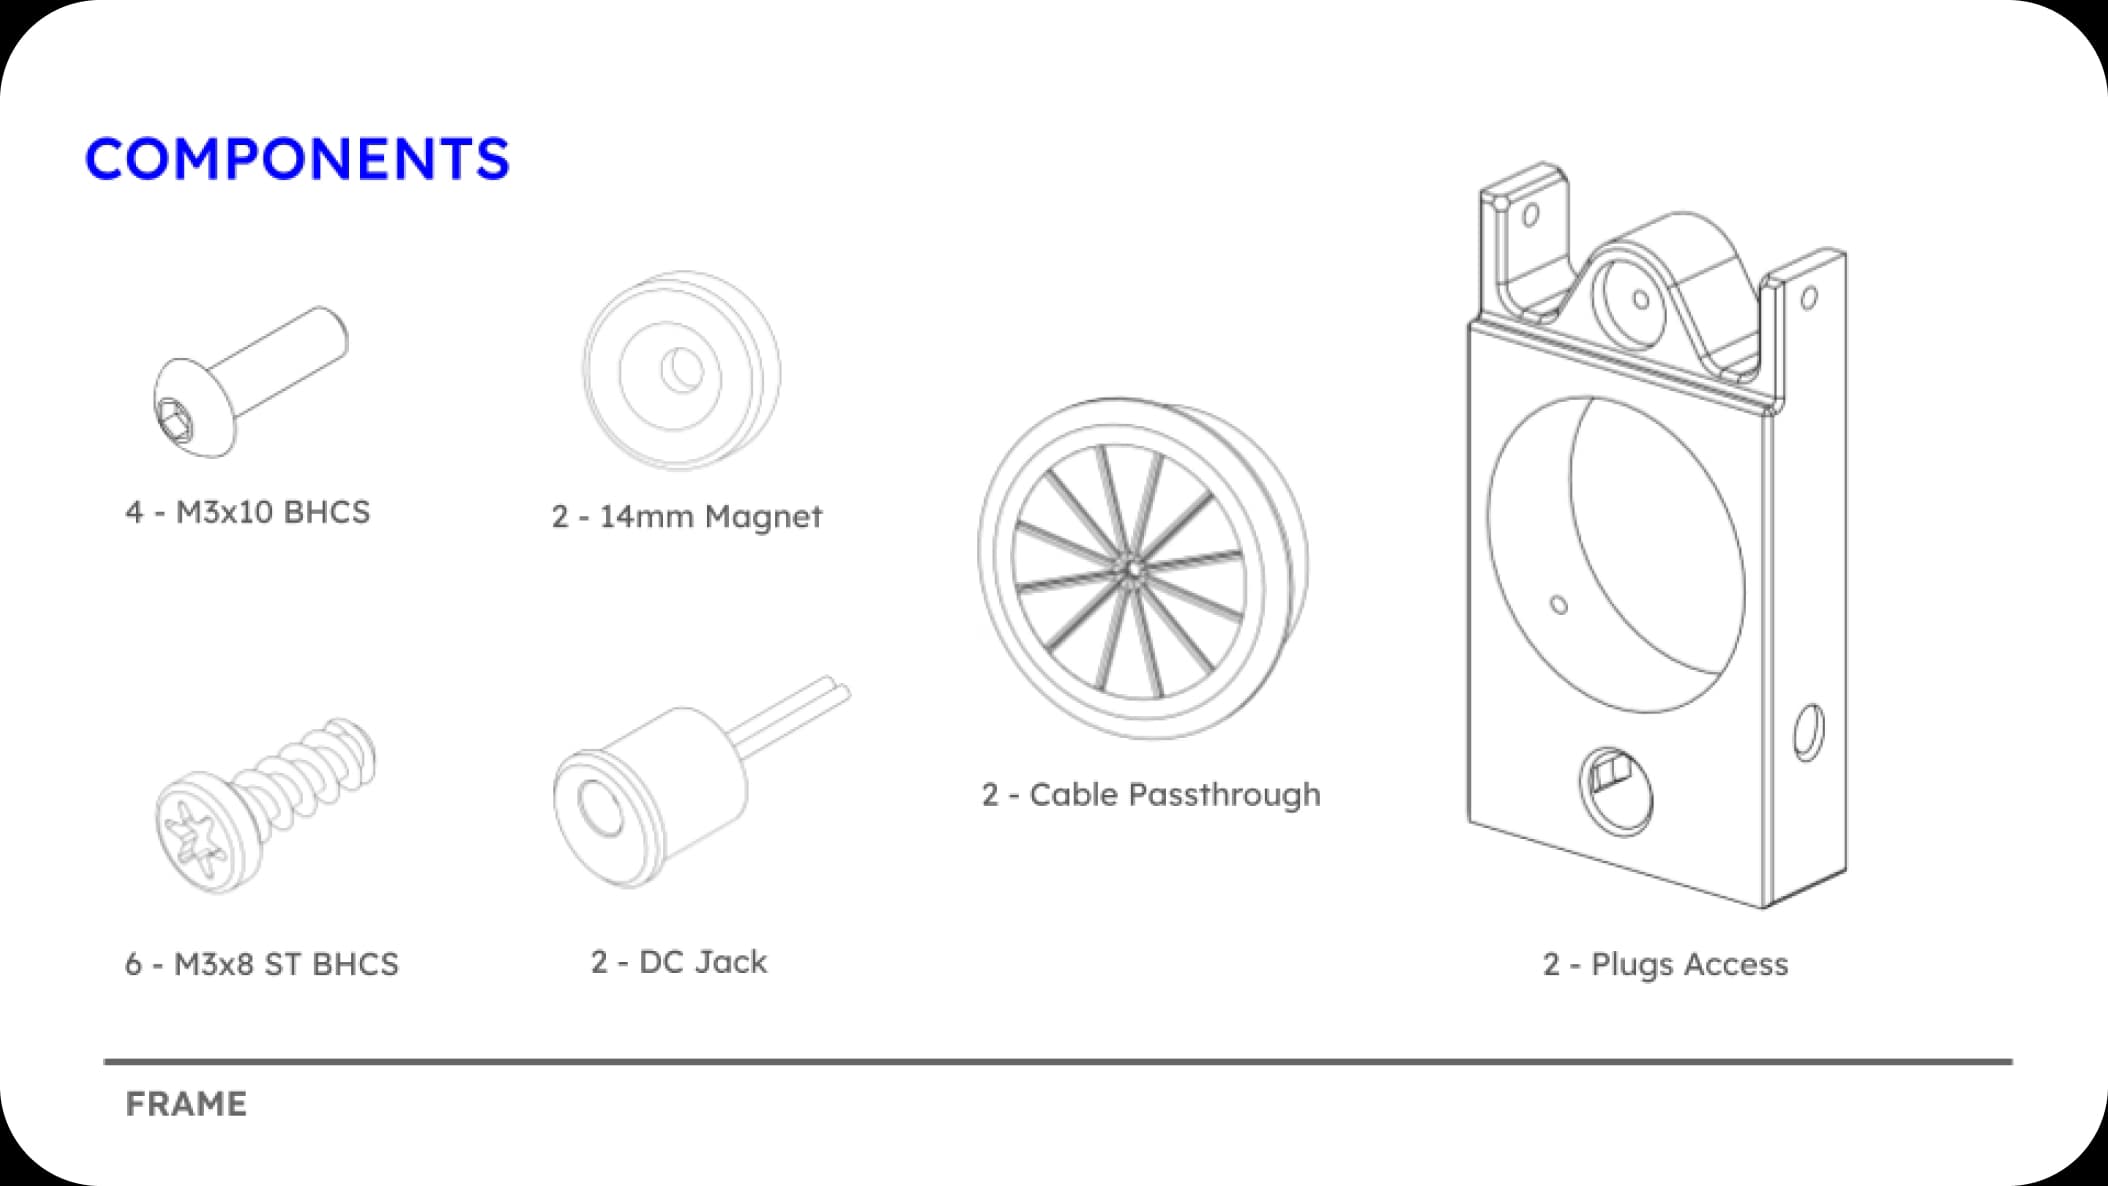
Component Preparation
Before you start building, the manual lists all the specific components and hardware needed for that section.
Section Completion
Every section ends with a clear visual separator to indicate the transition to the next part of the build.
Essential skills
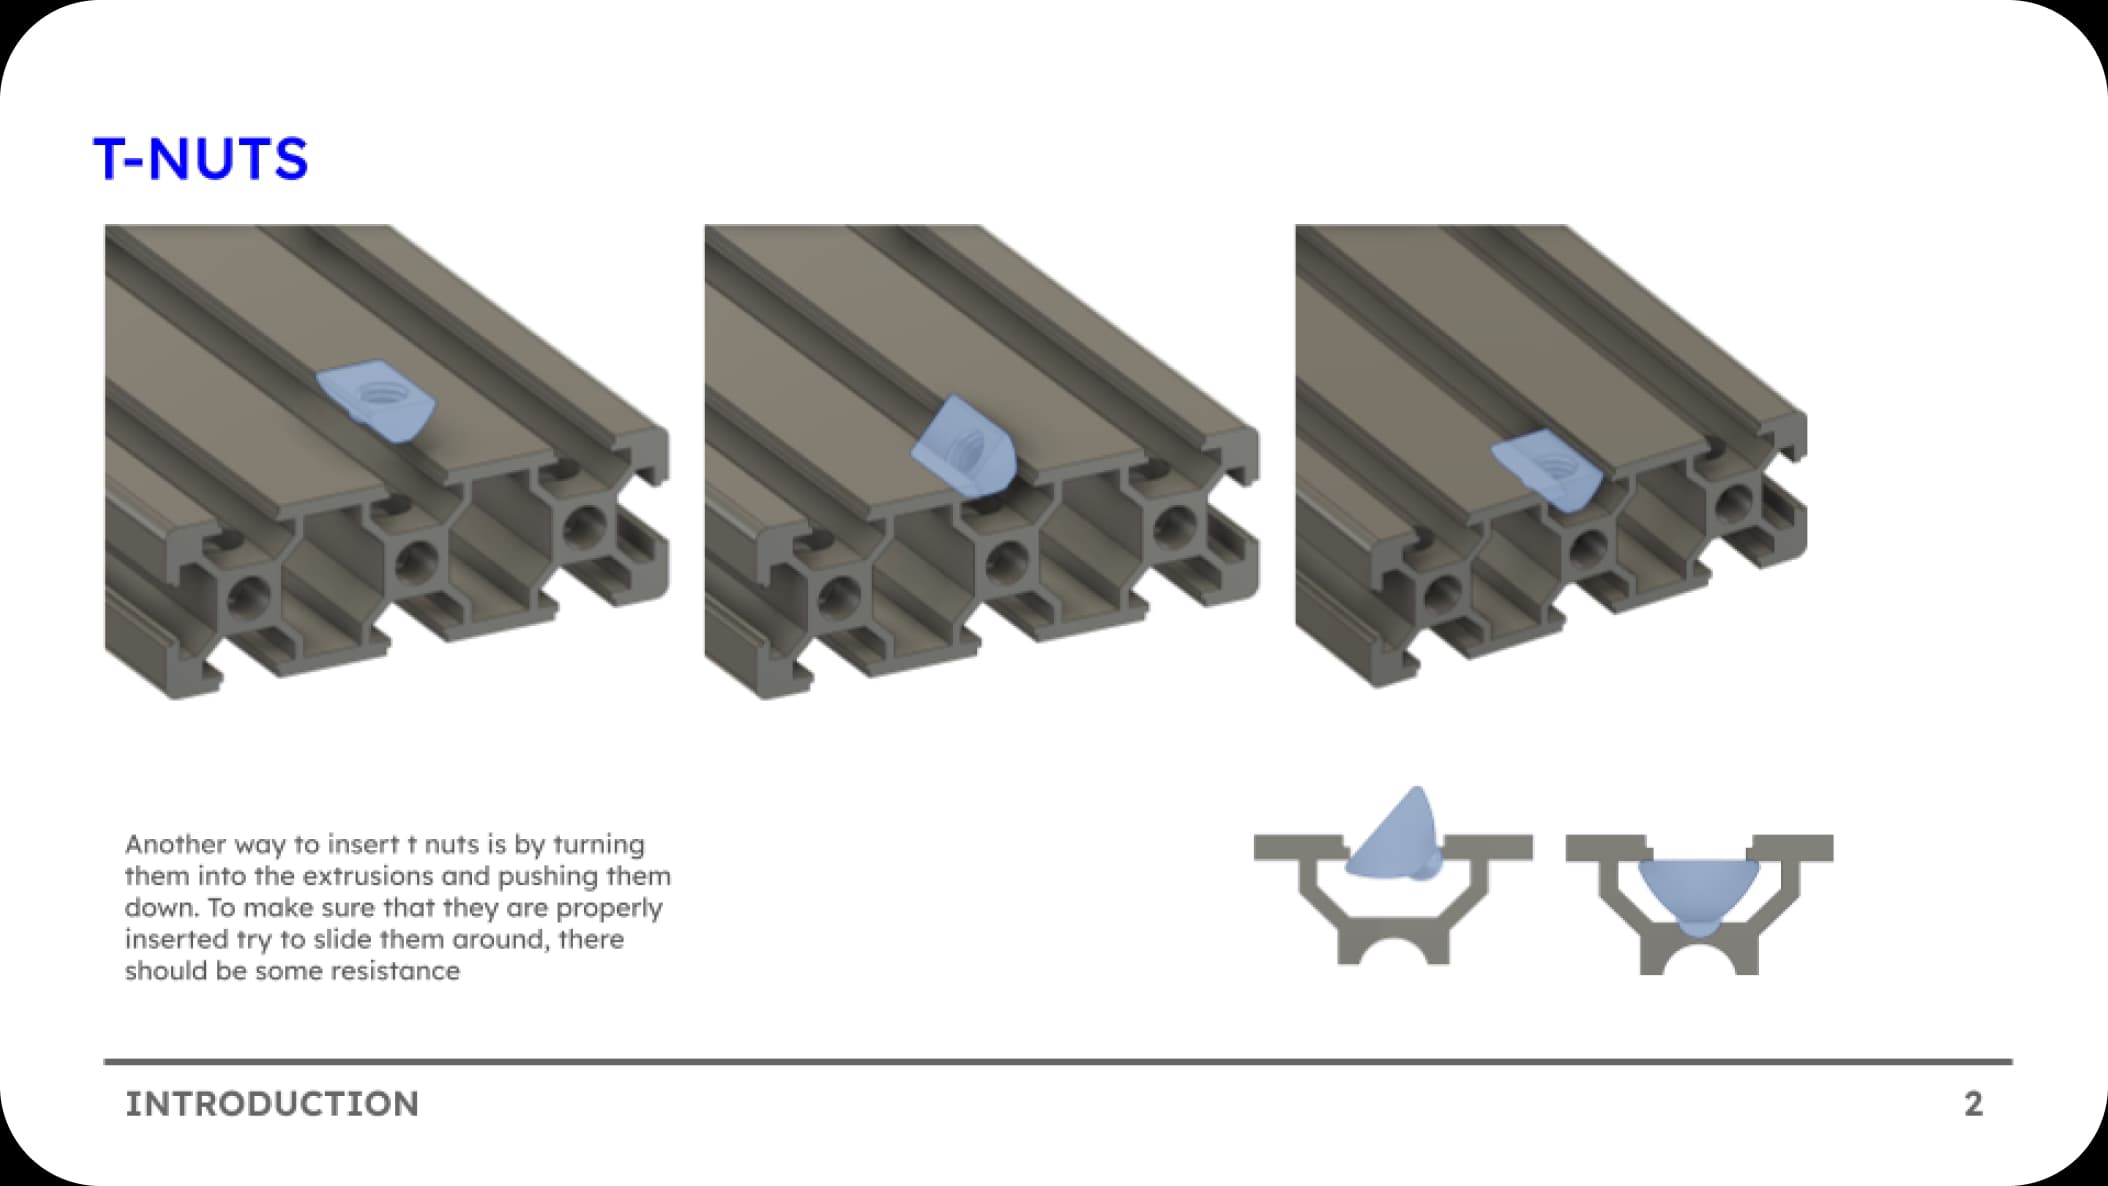
T-Nuts
Pretty much discontinued from the assembly process because of the simplicity of hammerhead nuts, but might be useful in a couple of steps.
- Installation: Insert into slot
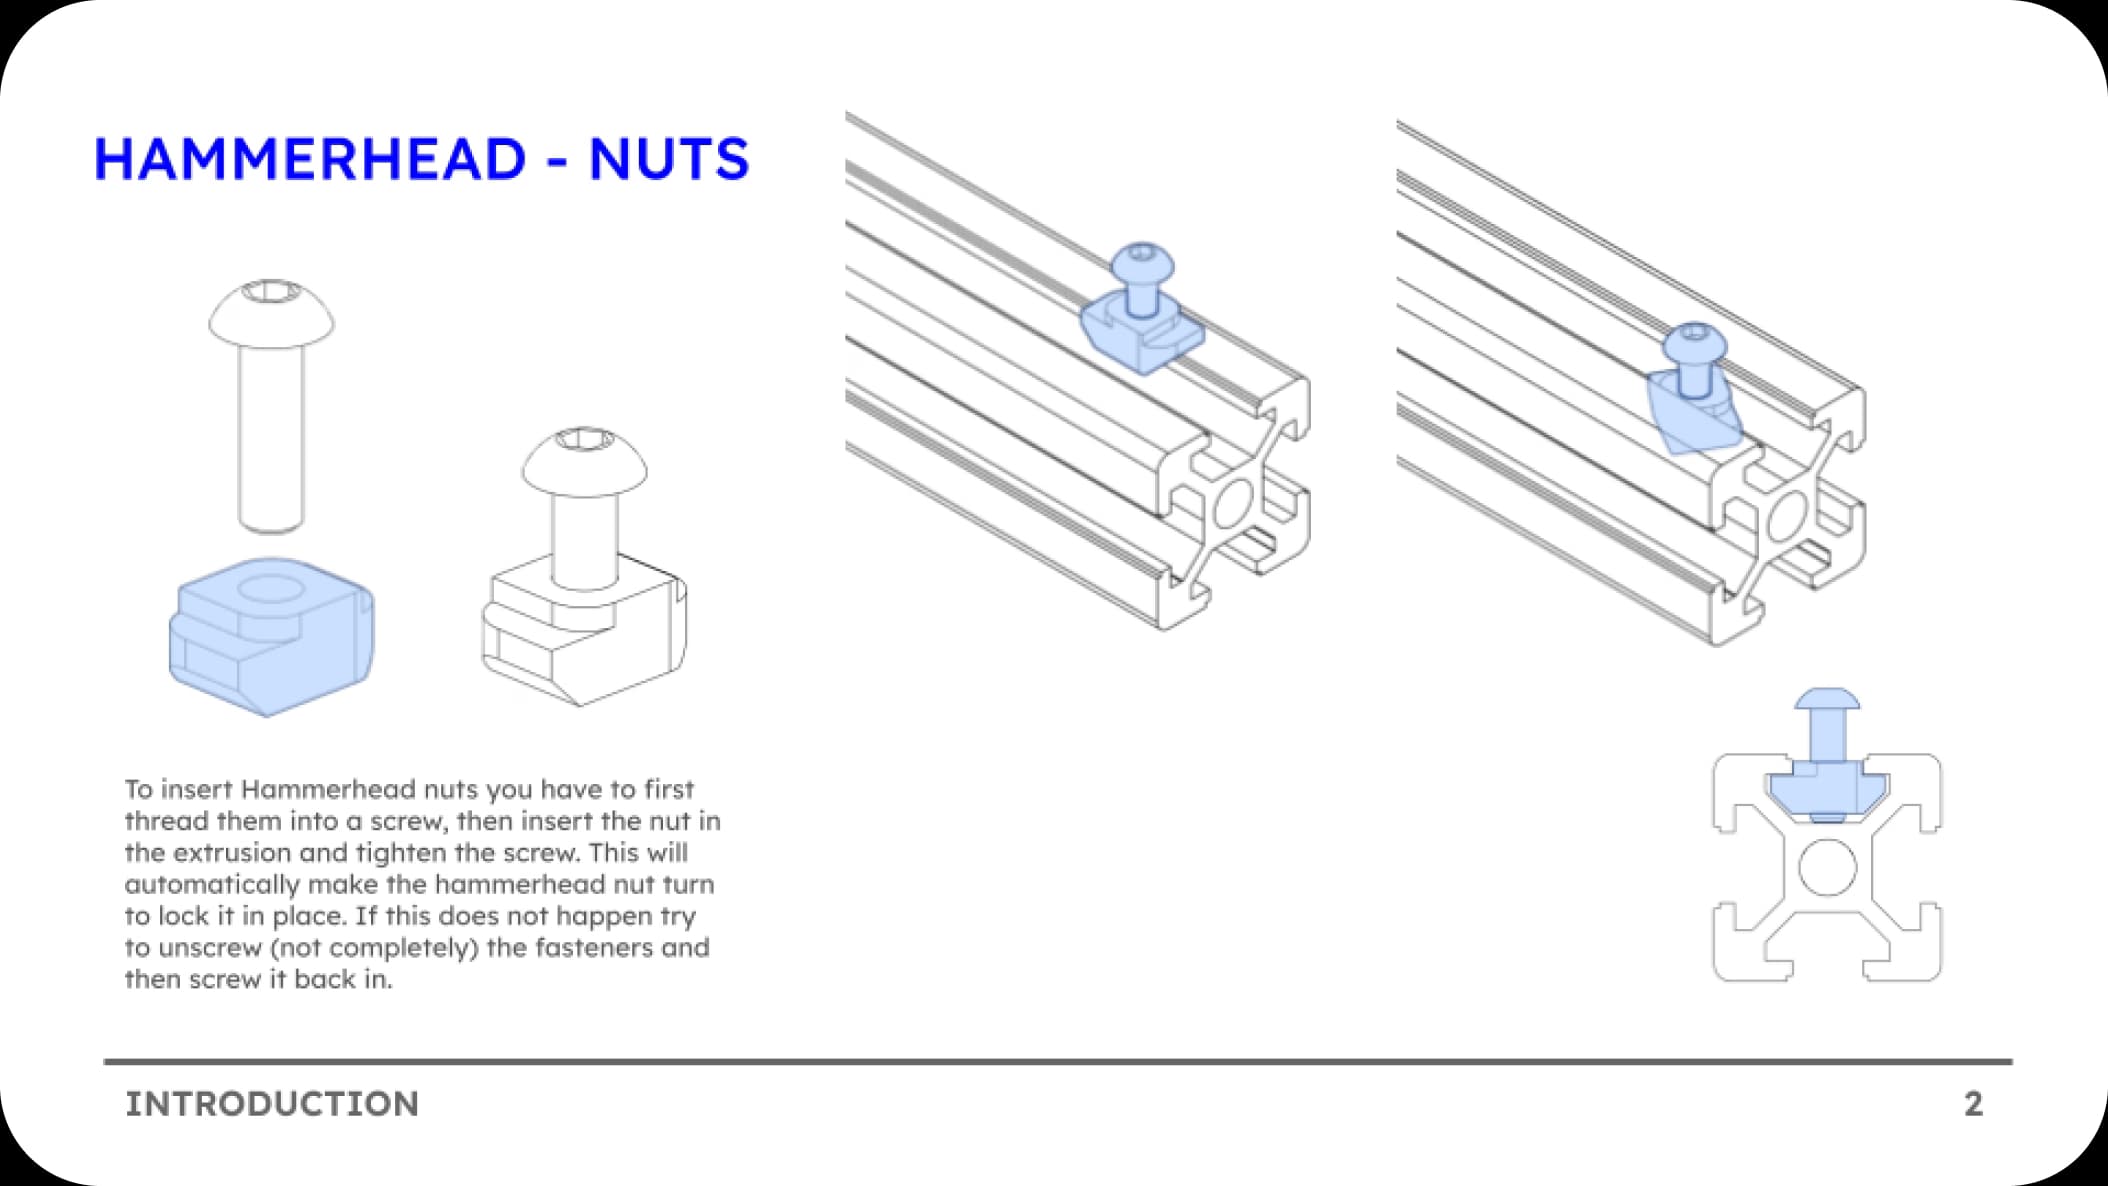
Hammerhead Nuts
Similar to T-Nuts but designed for insertion directly into extrusions with the part. (no need to pre place them).
- Installation: Insert into slot and then they will turn 90 degrees to lock.
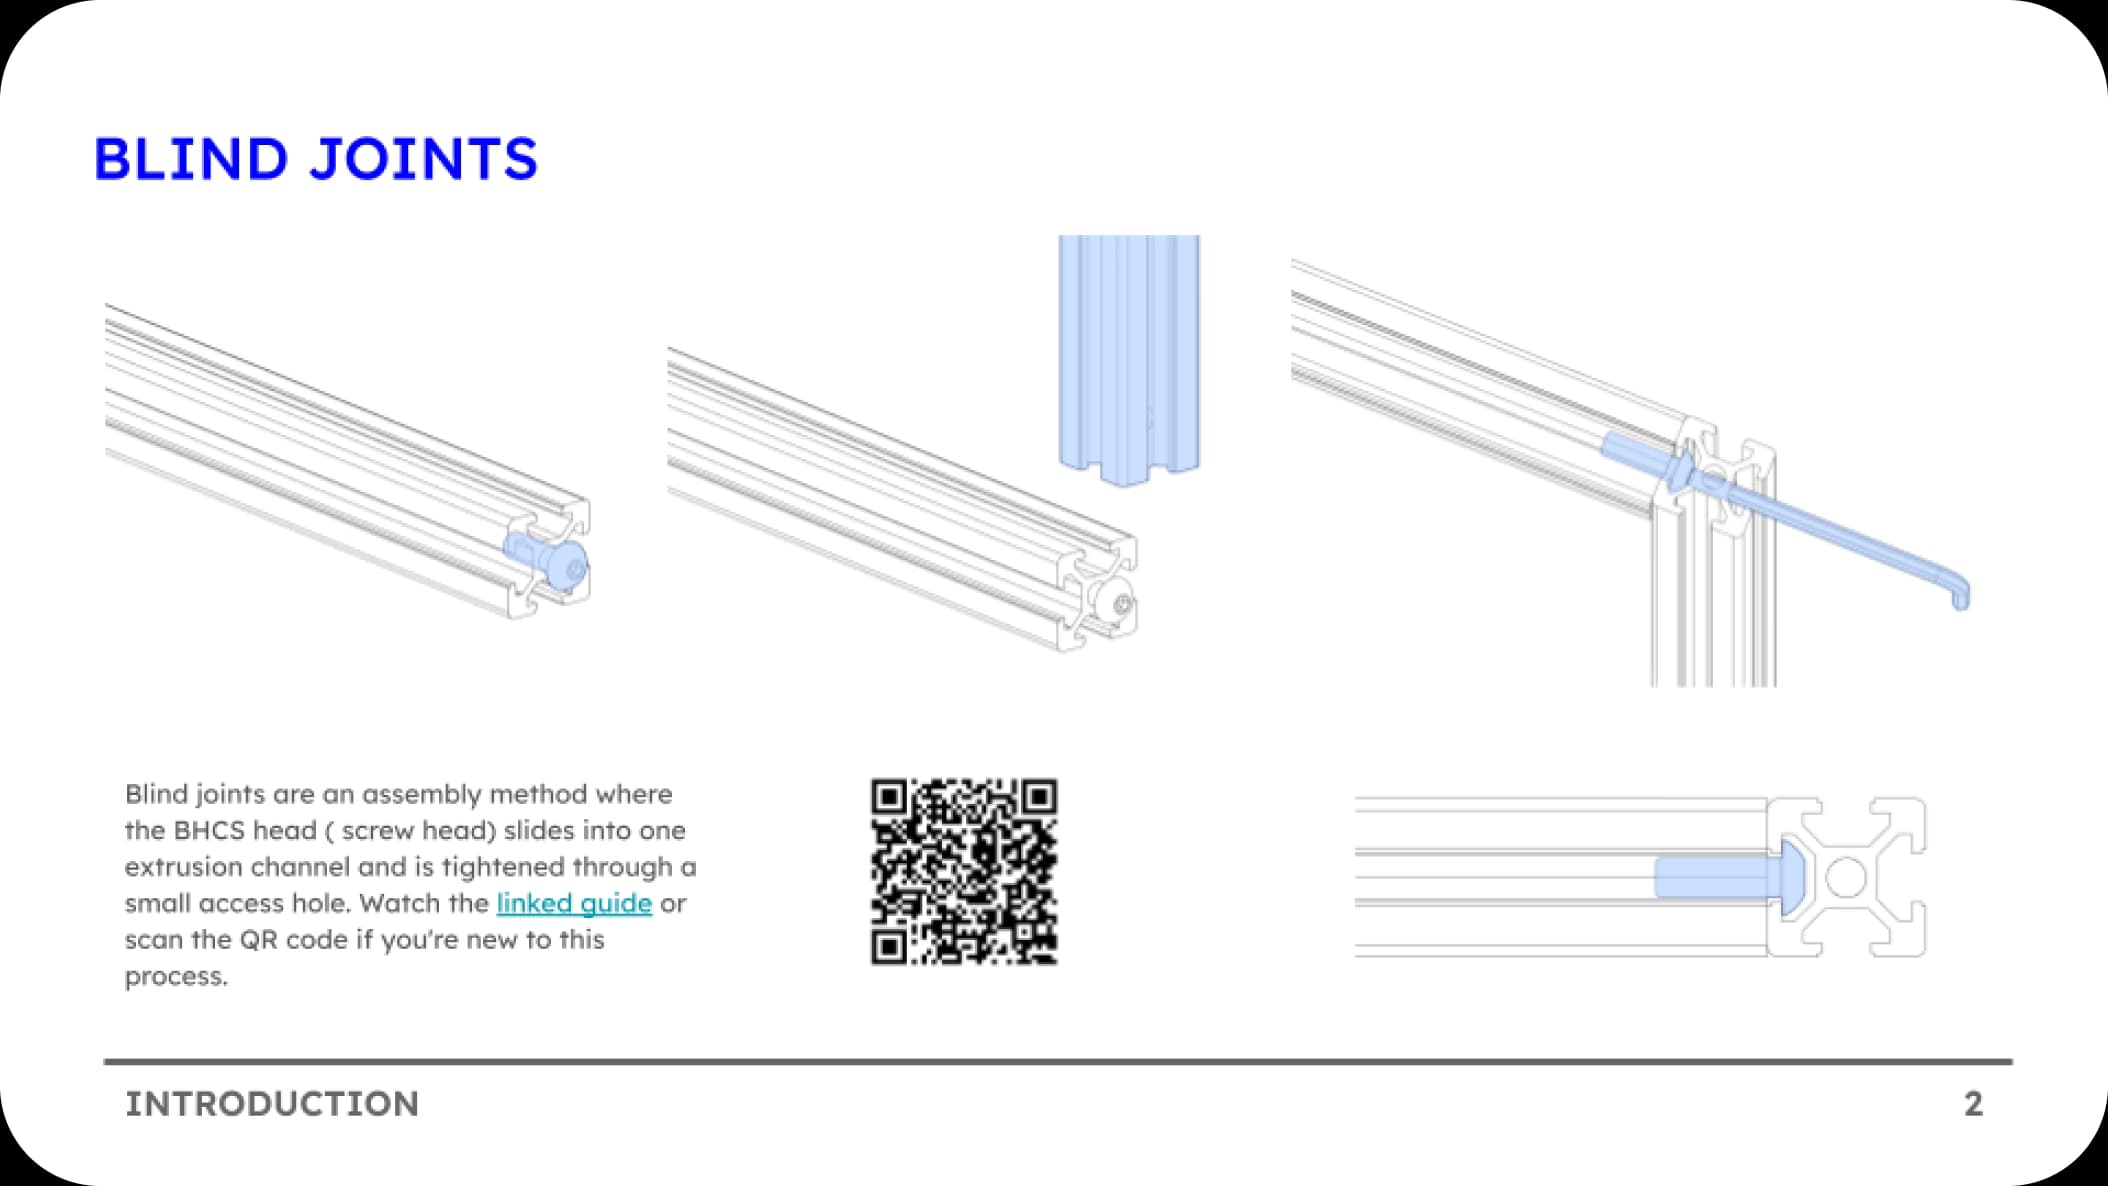
Blind Joints
This is the primary method used to assemble the frame, providing a clean and hidden connection between extrusions.
If you are new to blind joints, we highly recommend watching this demonstration by Canuck Creator: Watch Video